
Hi There...
We moved to a new cozy Home.. Please visit us at http://www.cooklikemom.net/
Thank You.
Monday, 14 November 2011
Tuesday, 8 November 2011
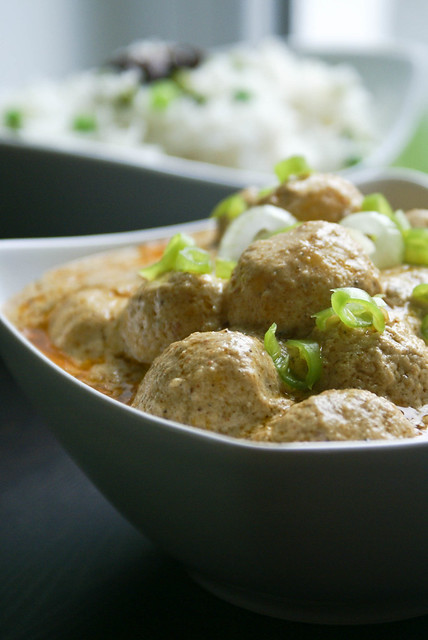
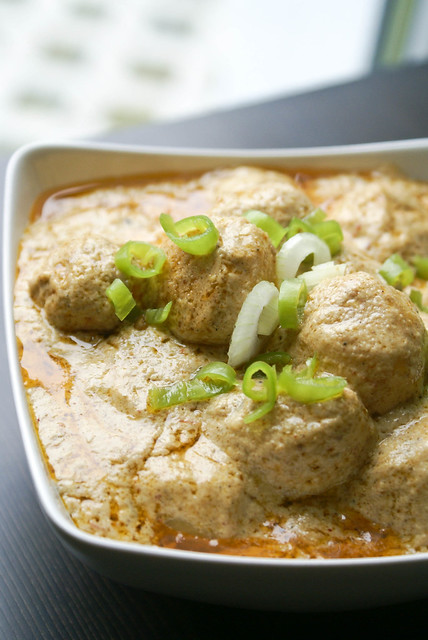
Dum Aloo
Dum Aloo is one of the exotic dish I relish.... I feel that it sometimes gets lost in the menu of a restaurant among all other fancy names of the dishes..
Potoates are such simple and can I say down to earth , that many take them lightly, one of my friend used to say, why does any one want to eat potatoes in a restaurant :-)
And talking of Dum Aloo, there are many ways to prepare it, Kashmiri Dum Aloo, Banarasi Dum Aloo, Punjabi Dum Aloo.... Some use Yougurt, some use coconut milk and some use cream.
Today it is about Kashmiri Dum Aloo...Rich Creamy Baby Potatoes in Yougurt Based Sauce....
I am not sure if it is authentic Kashmiri dish, because I changed it according to our taste buds...
What You Need :
Baby Potatoes : 15, approx
Red chilli powder : 1 tsp
Salt : to taste
Oil : For frying (See Notes)
Wash Baby Potatoes and pat dry. Peel them, and mix them with salt, chilli powder and 1 Tbsp of oil.
Heat oil in a Kadai, and fry the Potatoes till golden brown
Grind to Paste:
Onion : 1 Large, chopped
Tomato : 1, chopped
Ginger Garlic Paste : 2 Tbsp
Green Chillies : 3,chopped, increase or decrease according to your taste.
Heat 1 Tbsp of oil in a pan, and add all the ingredients listed above and fry till it gives nice smell and onions turn translucent and tomatoes are mushy.
Cool and blend to paste.
Grind to Powder:
Coriander Seeds : 2 Tbsp
Fennel Seeds: 2 Tbsp
Cardamom seeds : 1 tsp
Dry roast the above ingredients.
Cool and grind to fine powder.
Grind to Paste:
Almonds : 6-7, soaked in warm milk
Remove the skin of the almonds.
Grind to fine paste along with the milk.
Whole Garam Masala :
Shah Jeera : 1 tsp
Star Anise : 1
Cloves : 5
Cinnamon : 2 inch stick
Bay leaves : 3
Kitchen King or Garam Masala : 1 Tbsp
Curd : 250 gms, beat lightly with fork till smooth
Salt : to taste
Turmeric : 1 tsp
Butter : 2 Tbsp
Water : 1 cup
- Heat 2 Tbsps of Butter in a wide pan.
- Add all the ingredients listed under whole garam masala.
- Once they start crackling, add the onion and tomato paste.
- Add Turmeric.
- Fry for a min or two.
- Now add the prepared masala powder. Fry till the oil separates.
- Now add curd and mix well.
- Add the potatoes, kitchen king/garam masala powder, along with 1 cup of water.
- Close the lid and let it simmer on low heat for about 15 to 20 mins.
- Add in the almond paste and mix well. adjust salt.
- Simmer for 5 more mins.
- Turn off heat , and finally add coriander leaves.
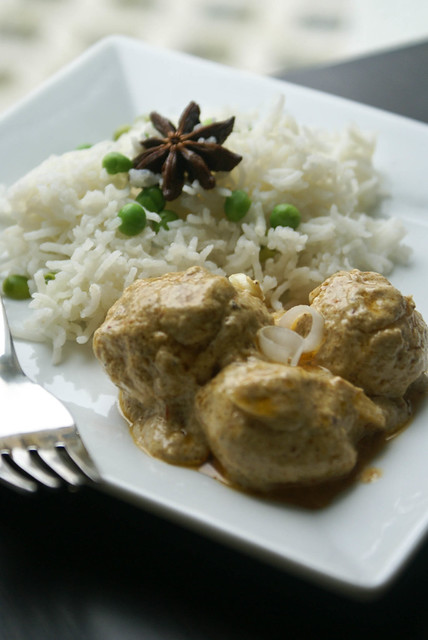
- Serve hot with Roti's, Naan's or Pulao
Mom's Tips :
You do not have baby potatoes, you can even use normal potatoes with are quartered.
Instead of deep frying, you can just heat one Tbsp of oil and shallow fry. OR you can even used boiled potatoes OR you can roast potatoes in oven till golden brown.
If the gravy gets thick, you can add half cup more water, but remember to adjust salt.
Thursday, 3 November 2011
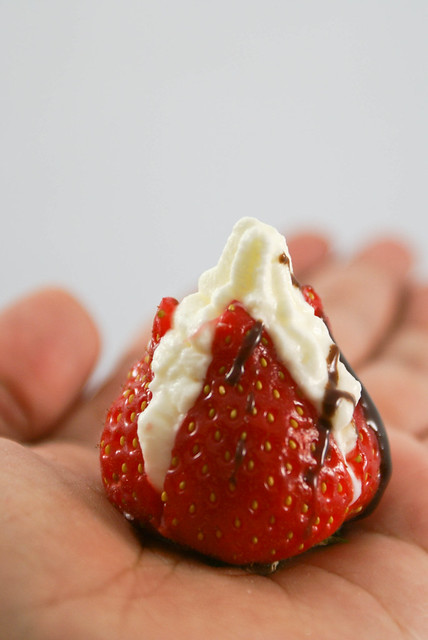
Strawberries and Cream
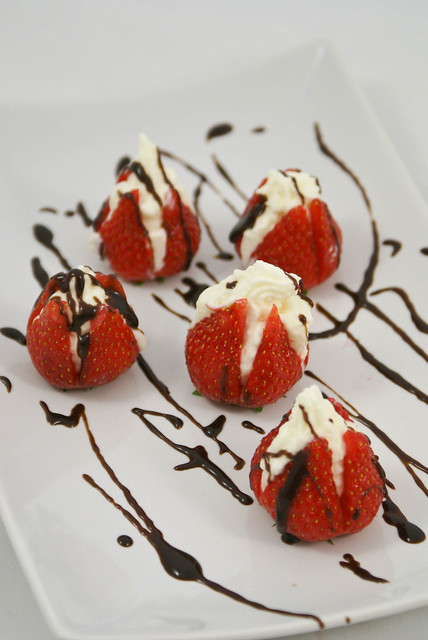
Berries.. in particular Strawberries and Whipped Cream, can it get better than that??
This is very easy to make and its fun if you try it with kids.. My son had wonderful time assisting me ... licking away all the extra cream :-)
What you Need :
Strawberries : 10 - 15, fresh and ripe
Mascarpone : 50 gms
Whipping Cream : 75 ml
Granulated White Sugar : 3 Tbsp
Vanilla extract : 1 tsp (optional)
Chocolate Sauce : to drizzle (optional)
- Wash the Strawberries and pat them dry with a kitchen towel.
- Make sure that the strawberries sit flat, if not cut the green stems off the strawberries so they will stand upright when served.
- With a small sharp knife, cut an "X" in each strawberry, cutting almost to the bottom of each strawberry. Make sure not to cut it till the end, if you do the strawberry comes apart.
- Gently with your fingertips, spread each strawberry apart to make "petals".
- Now make the cream filling.
- In a bowl whip the mascarpone cheese and whipping cream until soft peaks form. Add the sugar and vanilla and continue to whip until stiff peaks form.
- Spoon the cream into a piping bag fitted with a large tip.
- Pipe the cream into the strawberries.
- Place in the Refrigerator for 30 mins and serve cold.
- Drizzle with Chocolate Sauce if you like.
Monday, 31 October 2011
Happy Halloween

Wish you all a Very Happy Halloween!!
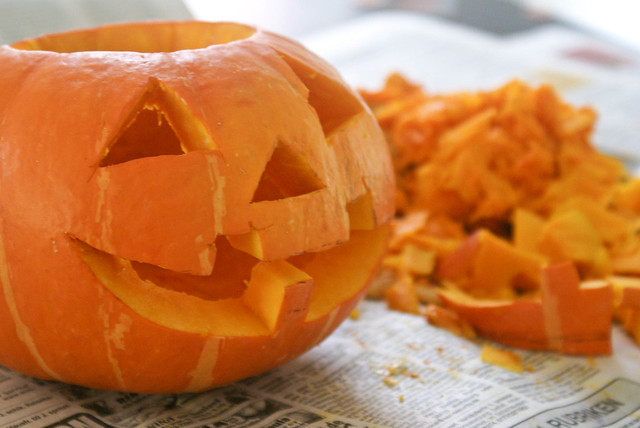
My son and I together carved this pumpkin. He was very excited about it :-)
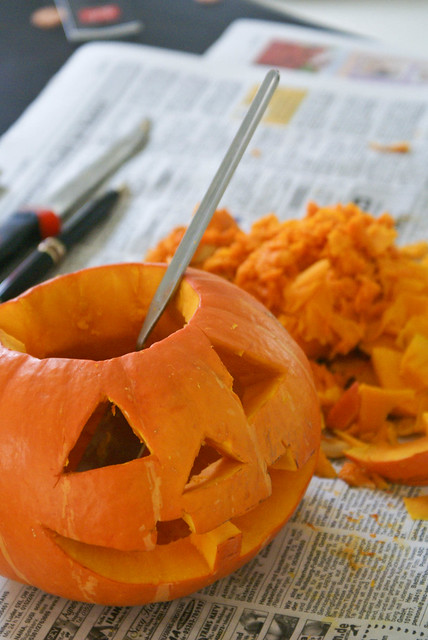
This was the first time we carved the pumpkin... and it came out quite well!!

Have Fun!!!
Tuesday, 25 October 2011
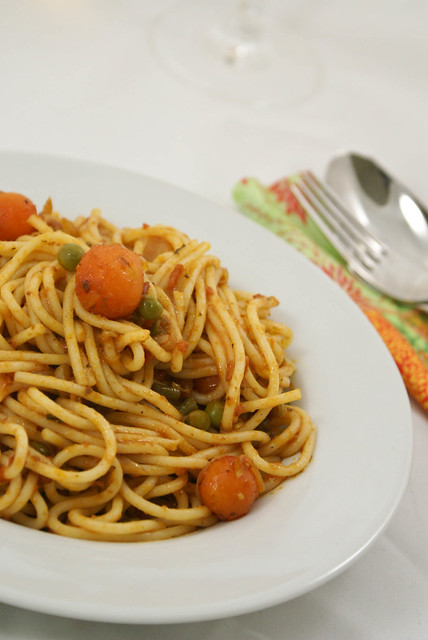
Jeera Spaghetti in Tomato Sauce
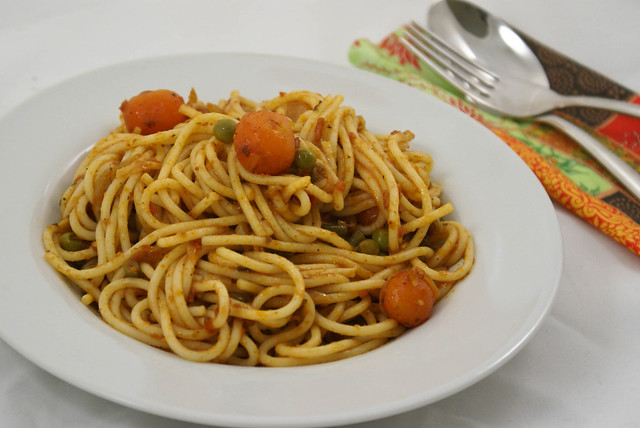
I am not a big fan of Italian food.
But my lil one is totally opposite :-) All the nakhras and excuses he gives every day during lunch and dinner just vanish if you place a piece of Pizza or a bowl of pasta before him.
Last week he was down with cold and fever and completely lost his appetite.. So the only way to make him eat was to cook his favorite, Spaghetti!!
What you need :
Spaghetti : 2 fistfuls, makes 4 servings
Onion : 1 small, finely sliced
Garlic : 3 cloves, crushed
Carrots : 1 , chopped
Beans : a fistful, chopped
Peas : 1 cup
Dried Oregano : 1 tsp
Dried Basil : 1 tsp
Kitchen King : 1 Tbsp
Jeera/ Cumin : 1 Tbsp
Salt : to taste
Olive oil : 2 - 3 Tbsp
For Tomato Sauce :
Tomatoes : 3 big, chopped
Onion : 1 small, chopped
Garlic : 2 - 3 cloves, crushed
Basil leaves : a handful
Sugar : 1 tsp
Chilli Flakes : 1 tsp
Salt and Pepper : to taste
Olive oil : 2 - 3 Tbsp
- Prepare Sauce : Heat oil in a pan, and add onions and garlic, fry for few mins.
- Add Tomatoes, Chilli and Sugar.
- Cover and Cook in low heat for about 15 to 20 min, till tomatoes are done.
- Add Basil leaves and season with salt and pepper.
- Let it cool, and transfer to a blender, and blend to a coarse paste.
- For Pasta : Prepare Spaghetti according to instructions and set aside.
- In a wide pan, heat oil.
- Add Jeera, garlic and onions, fry for few mins.
- Add dried oregano and basil.
- Now add the veggies(Carrots, peas, beans), season with salt and cook on low till the veggies are done.
- Add kitchen King and prepared tomato sauce.
- Mix well.
- At last add Spaghetti and toss.
- Serve hot.
Mom's Tips:
If the tomato sauce yields more than 1 and half or 2 cups, store the remaining in a bottle and keep it in refrigerator. You can store this for about 10 days.
You can add garam masala if you don't have kitchen king.
Thursday, 20 October 2011
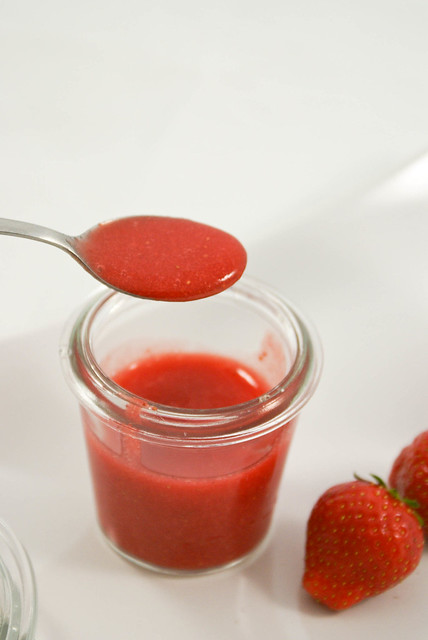
Strawberry Sauce/Puree
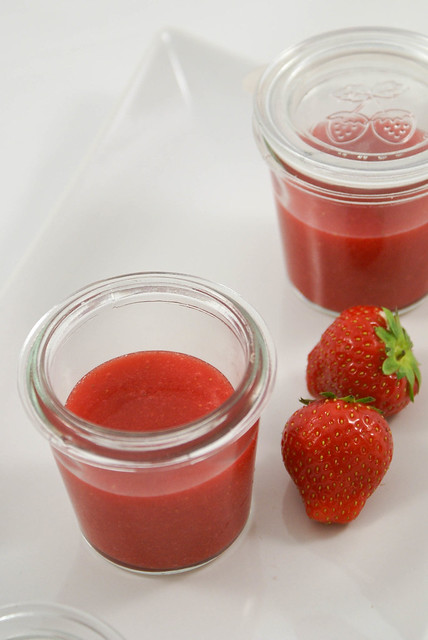
Autumn is starting and surprisingly I found some Strawberries in the Farmers market few days back... I wanted to preserve them so that we could have these delicious fruit even during the coming winter months.
I made a sauce out of half of the fruit. It is very simple recipe, and this sauce can be frozen and used when needed.
You can increase or decrease the quantity of sugar and lemon juice according to your taste.
What you Need :
Strawberries : 500 gms
Sugar : 100 gms
Lemon Juice : 2 - 3 Tbsp
- Wash the Strawberries, and remove the green stems, and cut into quarters.
- Put in the blender or food processor, add Sugar and blend till smooth.
- Remove and add lemon juice and mix well.
- Store in a jar and freeze.
- You can add this as topping on Vanilla ice cream or add it to milkshake.. and Enjoy!!
Monday, 17 October 2011
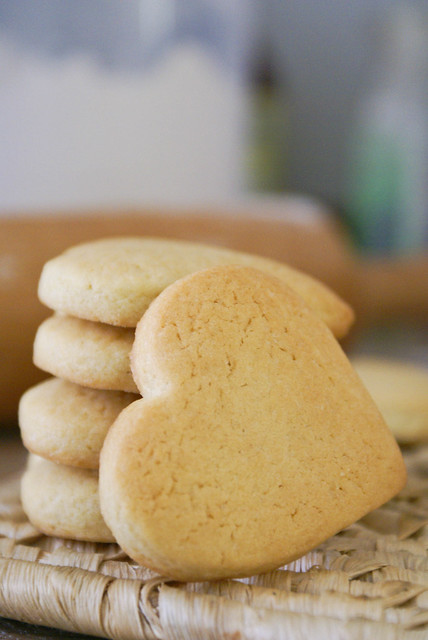
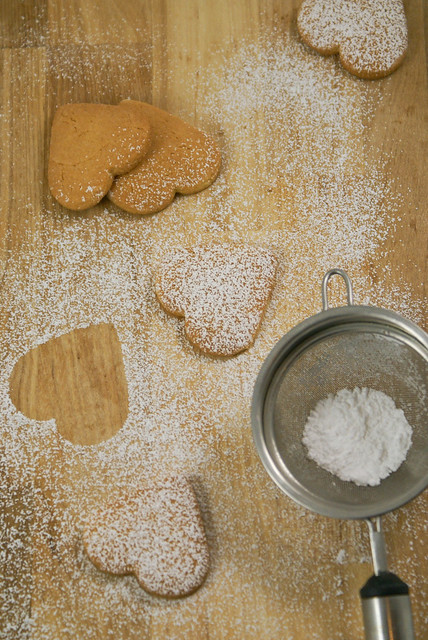
Sugar Cookies

Its been just about more than a month, my mom came... days flew so fast, that its almost time to say good-bye to her. After she came I became one lazy bum.. I guess it will take some time for me to get adjusted to my normal routine.
Shopping and packing is all done, but I wanted to send something homemade for my dad and cousins back in India.... After a lot of thinking, I came up with Sugar cookies.
I never made Sugar cookies before and that too with frosting. I always feel that frosting cookies is an art... just like painting with all those colored icings and piping bags....
The cookies came out really well... and icing was not very bad either, but I guess I have to practice more :-)
The recipe source is from here.
What you need:
For Cookies:
All purpose Flour : 400 gms
Butter : 225 gms, unsalted, at room temperature
Granulated white Sugar : 200 gms
Eggs : 2, at room temperature
Baking Soda : 1 tsp
Salt : 1/2 tsp
Vanilla extract : 2 tsp
For Icing:
Egg whites : 2, at room temperature
Lemon Juice : 2 tsp
Icing Sugar : 3 cups
- In a clean dry bowl sift together the flour, salt, and baking soda.
- In an other bowl, beat butter and sugar until light and fluffy.
- Add the eggs, one at a time and beat until combined.
- Now add vanilla extract and beat for 1 min.
- Add the flour mixture, in batches and beat until you have a smooth dough.
- The dough may be sticky and may come up the beater attachments, so beat at slow speed, scraping dough from the sides and from the attachments in between.
- Wrap the dough in a plastic wrap and refrigerate for about two to three hour, until firm enough to roll.
- Preheat oven to 200 degrees C.
- Line two baking sheets with parchment paper.
- Remove the chilled dough from the refrigerator and, take half of the dough and put the reaming half back in the refrigerator(because it is easy to work with small quantity of the dough)
- On a lightly floured surface, roll out the dough to a thickness of 1 cm.
- Making sure that the dough does not stick to the counter, keep turning the dough as you roll.
- Cut out desired shapes using a lightly floured cookie cutter and transfer to baking sheet. Place the baking sheets with the unbaked cookies in the refrigerator for about 15 minutes to chill the dough and prevent from losing their shape while baking.
- Bake cookies for about 8-10 minutes (depending on size). Mine took exactly 8 mins.(just until the edges start to brown)
- Remove from oven and cool them on a wire rack.
- Enjoy them as it is or frost with icing.
- Sift Icing sugar to remove any lumps.
- In the bowl beat the egg whites with the lemon juice, with the hand mixer.
- Add the sifted sugar and beat on low speed until smooth.
- Add more sugar or water to get the right consistency.
- Add food coloring, if desired.
- The icing needs to be used immediately or put in an airtight container as it hardens when exposed to air.
- I made icing with 2 types of consistencies.
- One little thick with which I piped the edges, and then with the icing of flowing consistency(lil thin) I filled the inside using a spoon.

Mom's Tips:
Using disposable piping bags is helpful when using more colors.
When frosting, let the edges dry, before filling with thin consistency icing.
I found this wonderful site which shows how to frost cookies, If interested have a look.
Subscribe to:
Posts (Atom)